


This video and article are part of Cooking 101, our series on kitchen fundamentals. Every episode covers a different technique, with tips and recipes from guest hosts who are experts to set you up for success.
Credit…Adam Centrella
There are myriad ways to cook a Thanksgiving turkey, and I’ve probably tried them all. I’ve spatchcocked, grilled and splayed. I’ve wet-brined, butter-basted and chile-swabbed. But with each new recipe I try, I grow more convinced that the simpler it is, the better the bird and the happier the cook.
To come up with a fuss-free recipe for crisp, golden skin and juicy, well-seasoned meat, I tested nearly a dozen versions and stripped the process to its essentials. The result was a recipe that’s simple enough to memorize, and then make again and again. The hardest part is carving out time to brine the bird, but it’s all streamlined for the most delicious and seamless bird possible — the perfect Thanksgiving turkey.
Step 1: Buy the Bird
If you’re buying a fresh turkey, pick it up three to five days before Thanksgiving.Credit…David Malosh for The New York Times. Food Stylist: Barrett Washburne.
When to Buy
A week before Thanksgiving, or even earlier, start thinking about buying your turkey — if for no reason other than that most turkeys are sold frozen, and you’ll need a few days to thaw it out in the fridge. If you’re buying a fresh turkey, pick it up three to five days before Thanksgiving to give yourself enough time to brine.
How Much to Buy
Plan for 1 to 1 ½ pounds of turkey per person. It’s easier to roast a smaller (10- to 12-pound) bird than to wrestle with a 20-pounder, so if you’re feeding a crowd, it may be wisest to roast a small turkey with some parts alongside, either a breast, thighs or a combination.
Understanding the Labels
There are so many choices for buying turkeys. Here’s a breakdown of what’s on offer.
Organic: These birds have been fed an organic, pesticide-free vegetarian diet. They’ve had access to outdoor space and never been given antibiotics.
Heritage: Compared with standard supermarket breeds, heritage birds more closely resemble their wild turkey ancestors and generally take longer to reach maturity. They tend to have a higher ratio of dark meat and a richer, gamier flavor.
Free-range/pasture-raised: These turkeys have had access to outdoor space. Depending on the farm, they may have also been able to forage for a portion of their food.
All-natural: Birds labeled natural won’t have been treated with preservatives or any artificial or synthetic ingredients.
Kosher: Raised and slaughtered under rabbinical supervision according to Jewish dietary laws, these birds have also been salted (all kosher meat is salted). If using a kosher turkey, you can skip the salt in the dry brine entirely and just rub the bird down with pepper and aromatics before letting it dry out in the fridge. Or, for a deeply seasoned bird, sprinkle it lightly with salt, but be careful not to overdo it.
Self-basting: These birds have been injected with a solution of salt water (sometimes spiked with fat, preservatives and flavorings) to make them juicier. But rather than buy one of these, a standard bird with a dry brine works in the same way and gives you control over what you add.
Hormone-free: Poultry birds are never given hormones, so, if you see this on the label, it’s a marketing ploy.
Step 2: Assemble the Tools
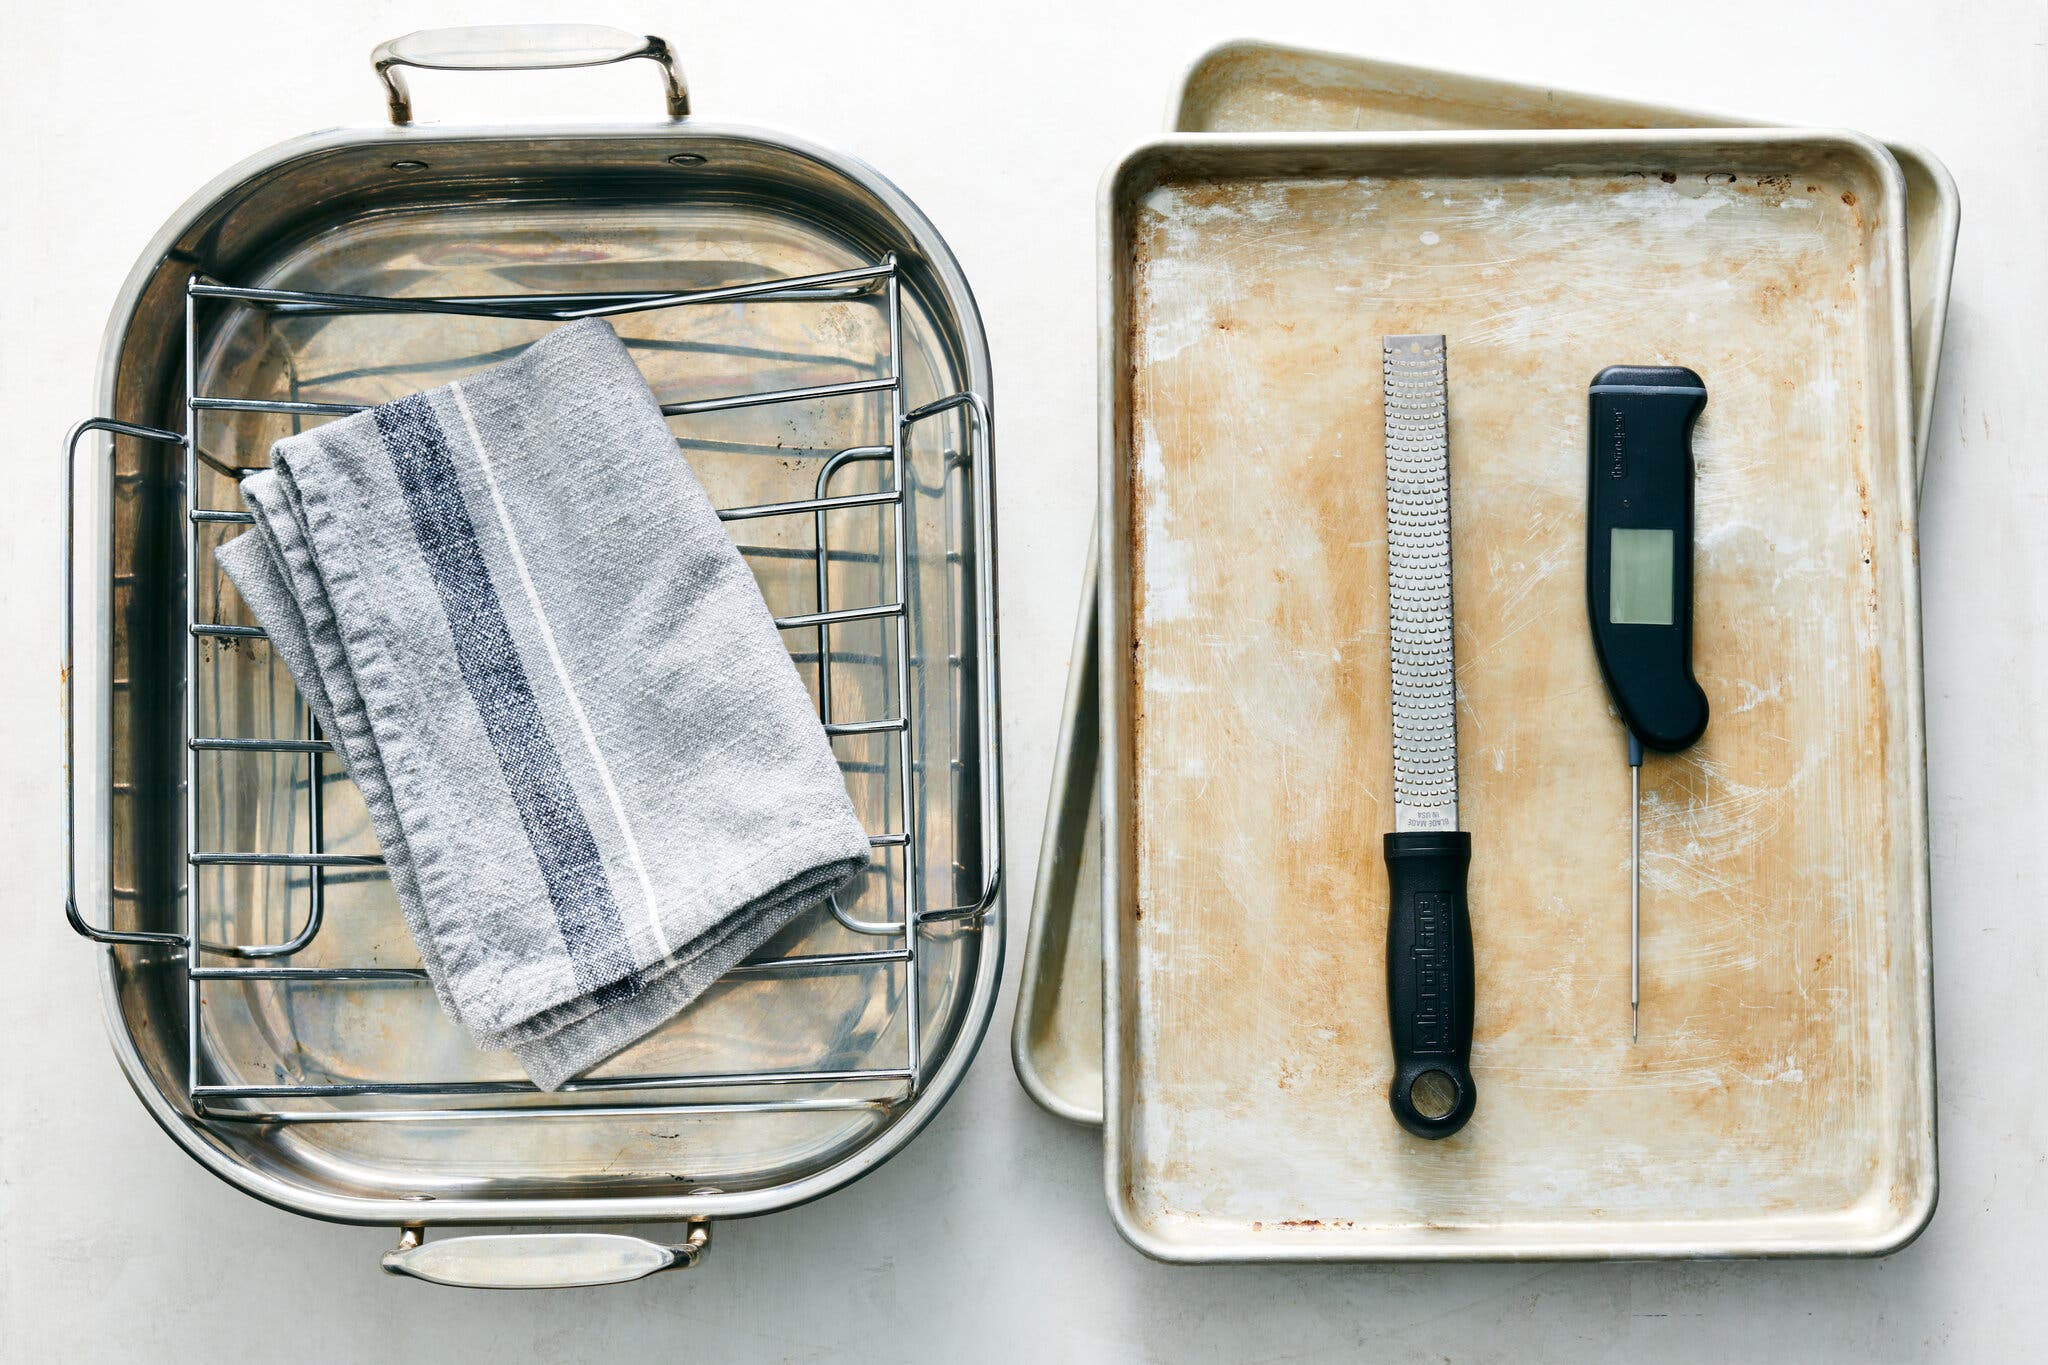
You don’t need a baster for an ideal turkey, but a thermometer is essential.Credit…David Malosh for The New York Times. Food Stylist: Barrett Washburne.
What You Need
-
Roasting pan with a rack, for cooking
-
Meat thermometer, for testing doneness
-
Sheet pan, for dry-brining in the fridge
-
Microplane, for grating garlic and zesting citrus
-
Dish towels, for wiping up the inevitable drips
What You Don’t
Step 3: Prep the Turkey
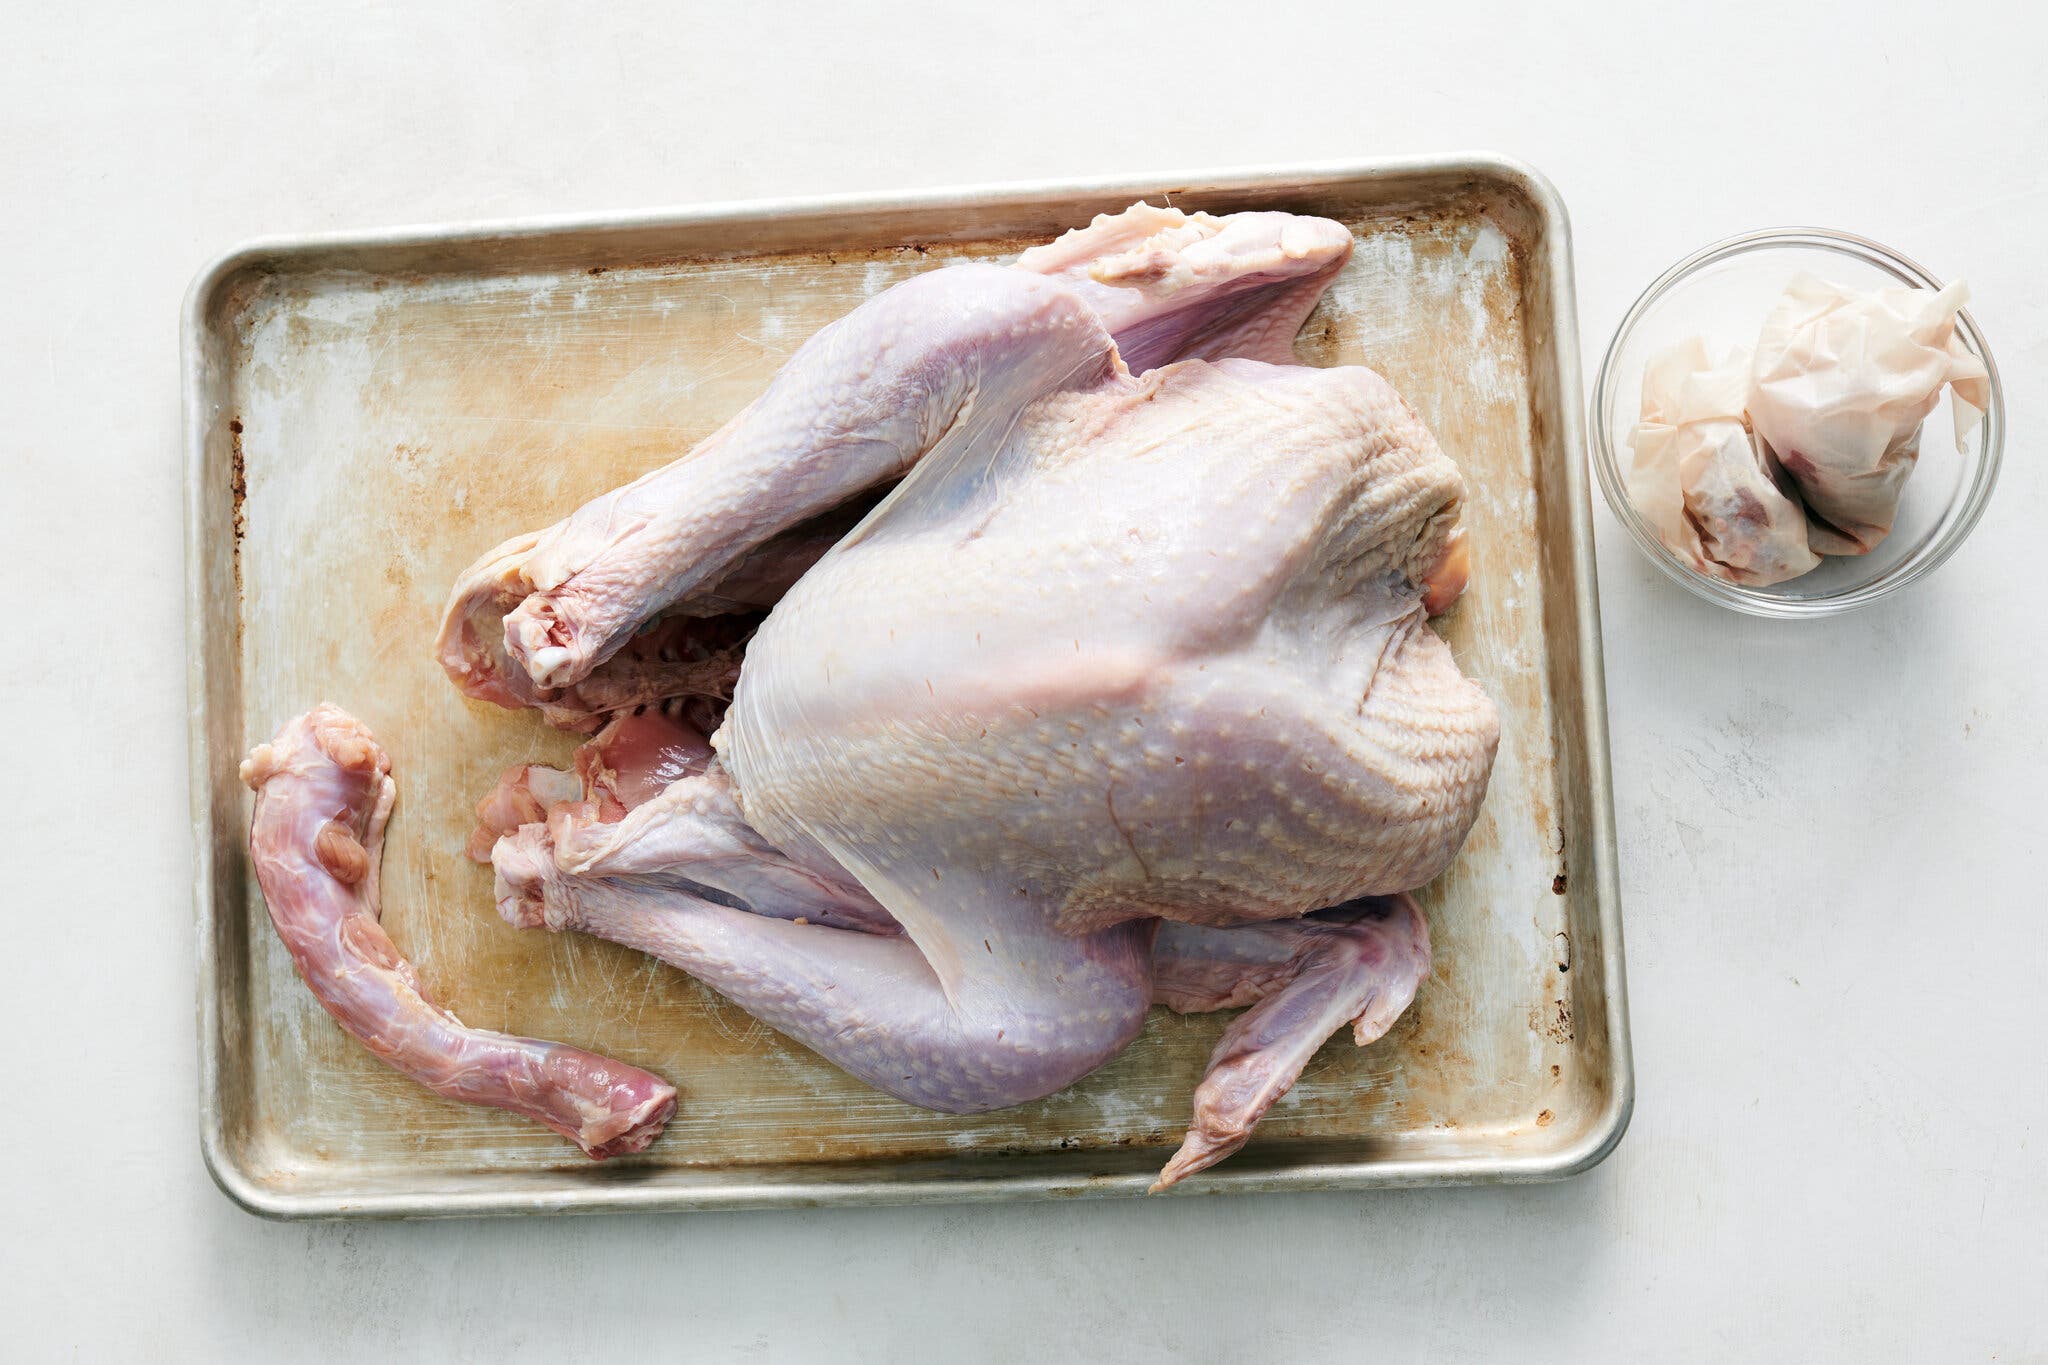
Before cooking, pull the neck and bag of giblets out of your turkey.Credit…David Malosh for The New York Times. Food Stylist: Barrett Washburne.
If your turkey is frozen, you’ll need to defrost it thoroughly in the fridge in its wrappings before cooking. Allow 24 hours of defrosting for every four to five pounds, which means a 12-pound bird will take about three days to defrost. And while you can apply the dry brine to the bird when it’s still partly frozen, it’s not ideal. The skin won’t dry out as much or get as crisp.
Once thawed, unwrap your bird, then poke around to find the neck and the bag of giblets that are usually tucked away inside (sometimes under the neck flap, so check carefully). Reserve the gizzard and heart for making stock, and fry up the liver in a little olive oil with a rosemary or thyme sprig if you have one on hand. It’s an excellent snack served on garlic-rubbed toast. I like to roast the neck alongside the bird, but you could also add that to the stock pot.
Step 4: Add the Dry Brine
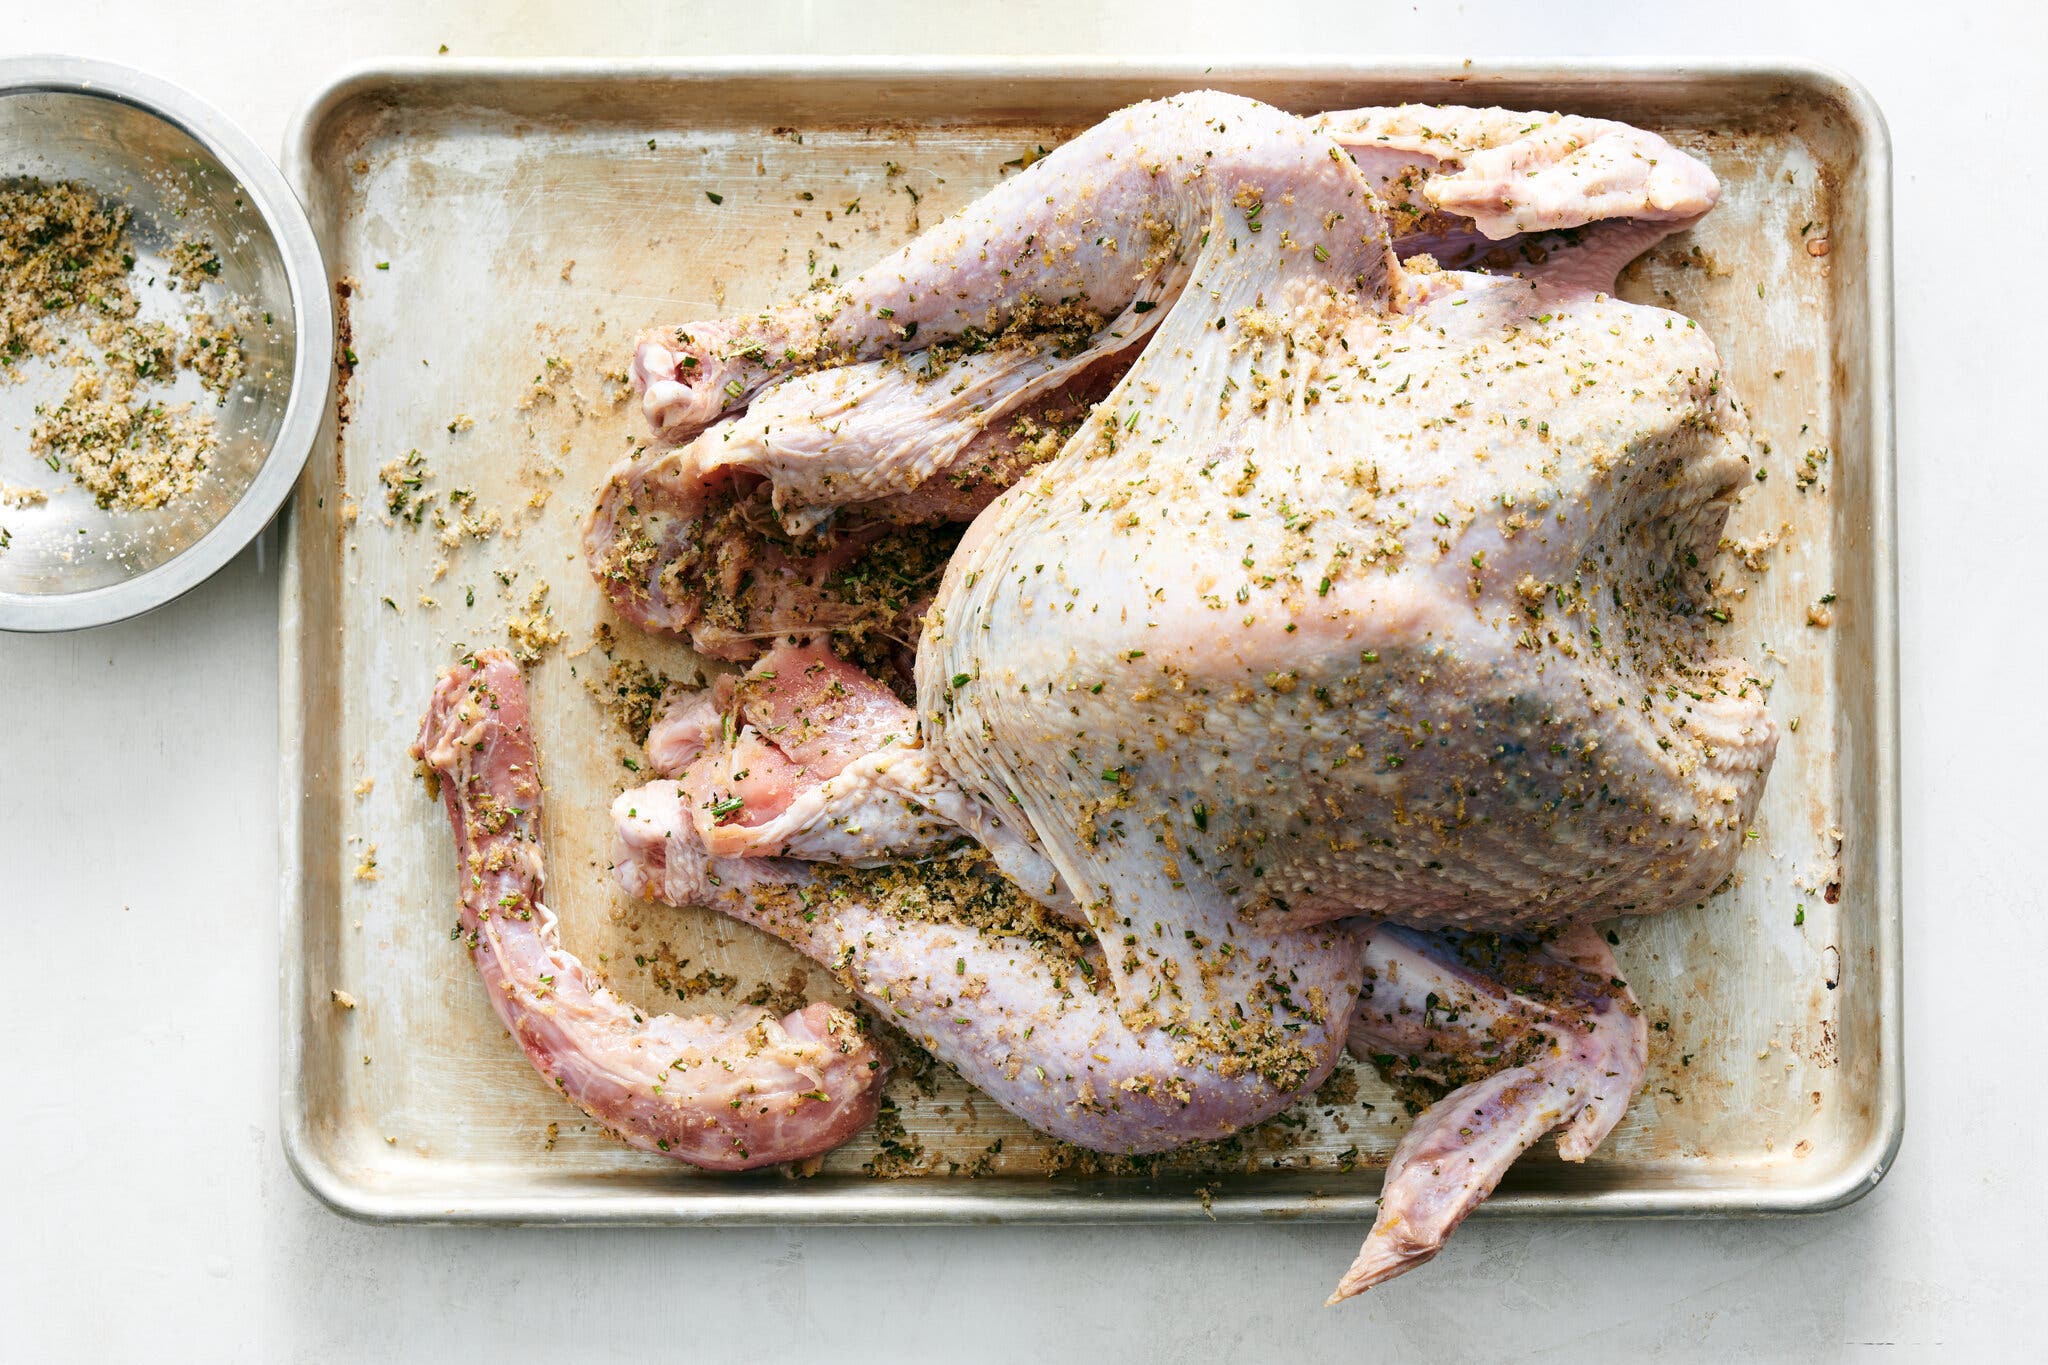
Pat the turkey down, then rub it with a dry brine.Credit…David Malosh for The New York Times. Food Stylist: Barrett Washburne.
Don’t rinse your turkey, just pat it all over with paper towels before rubbing it down with the dry brine. (For the most basic dry brine, you can stick to using just salt and maybe a little pepper. Or, bump up the flavor by adding garlic, herbs, spices, citrus zest, chiles or other aromatics.) This method is easier and less cumbersome than submerging a whole turkey in a wet brine and yields crispier skin. That said, if you do want to wet-brine your bird, here’s a recipe.
If you don’t mind getting extra close with your turkey, use your hands to carefully separate the skin from the breast and thighs, and rub the brine directly on the flesh. This purely optional step makes a small difference, but it’s not a huge deal in terms of outcome. If you’re roasting the neck, salt that, too.
Put the salted turkey on a sheet-pan breast-side down, preferably on a rack so the air can circulate underneath it, and refrigerate uncovered for at least 12 hours and up to three days. About halfway through the brining, flip the turkey over so its breast side is up. This helps evenly distribute the brine.
Remove the bird from the fridge an hour before roasting to let it come to room temperature.
Step 5: Roast the Turkey
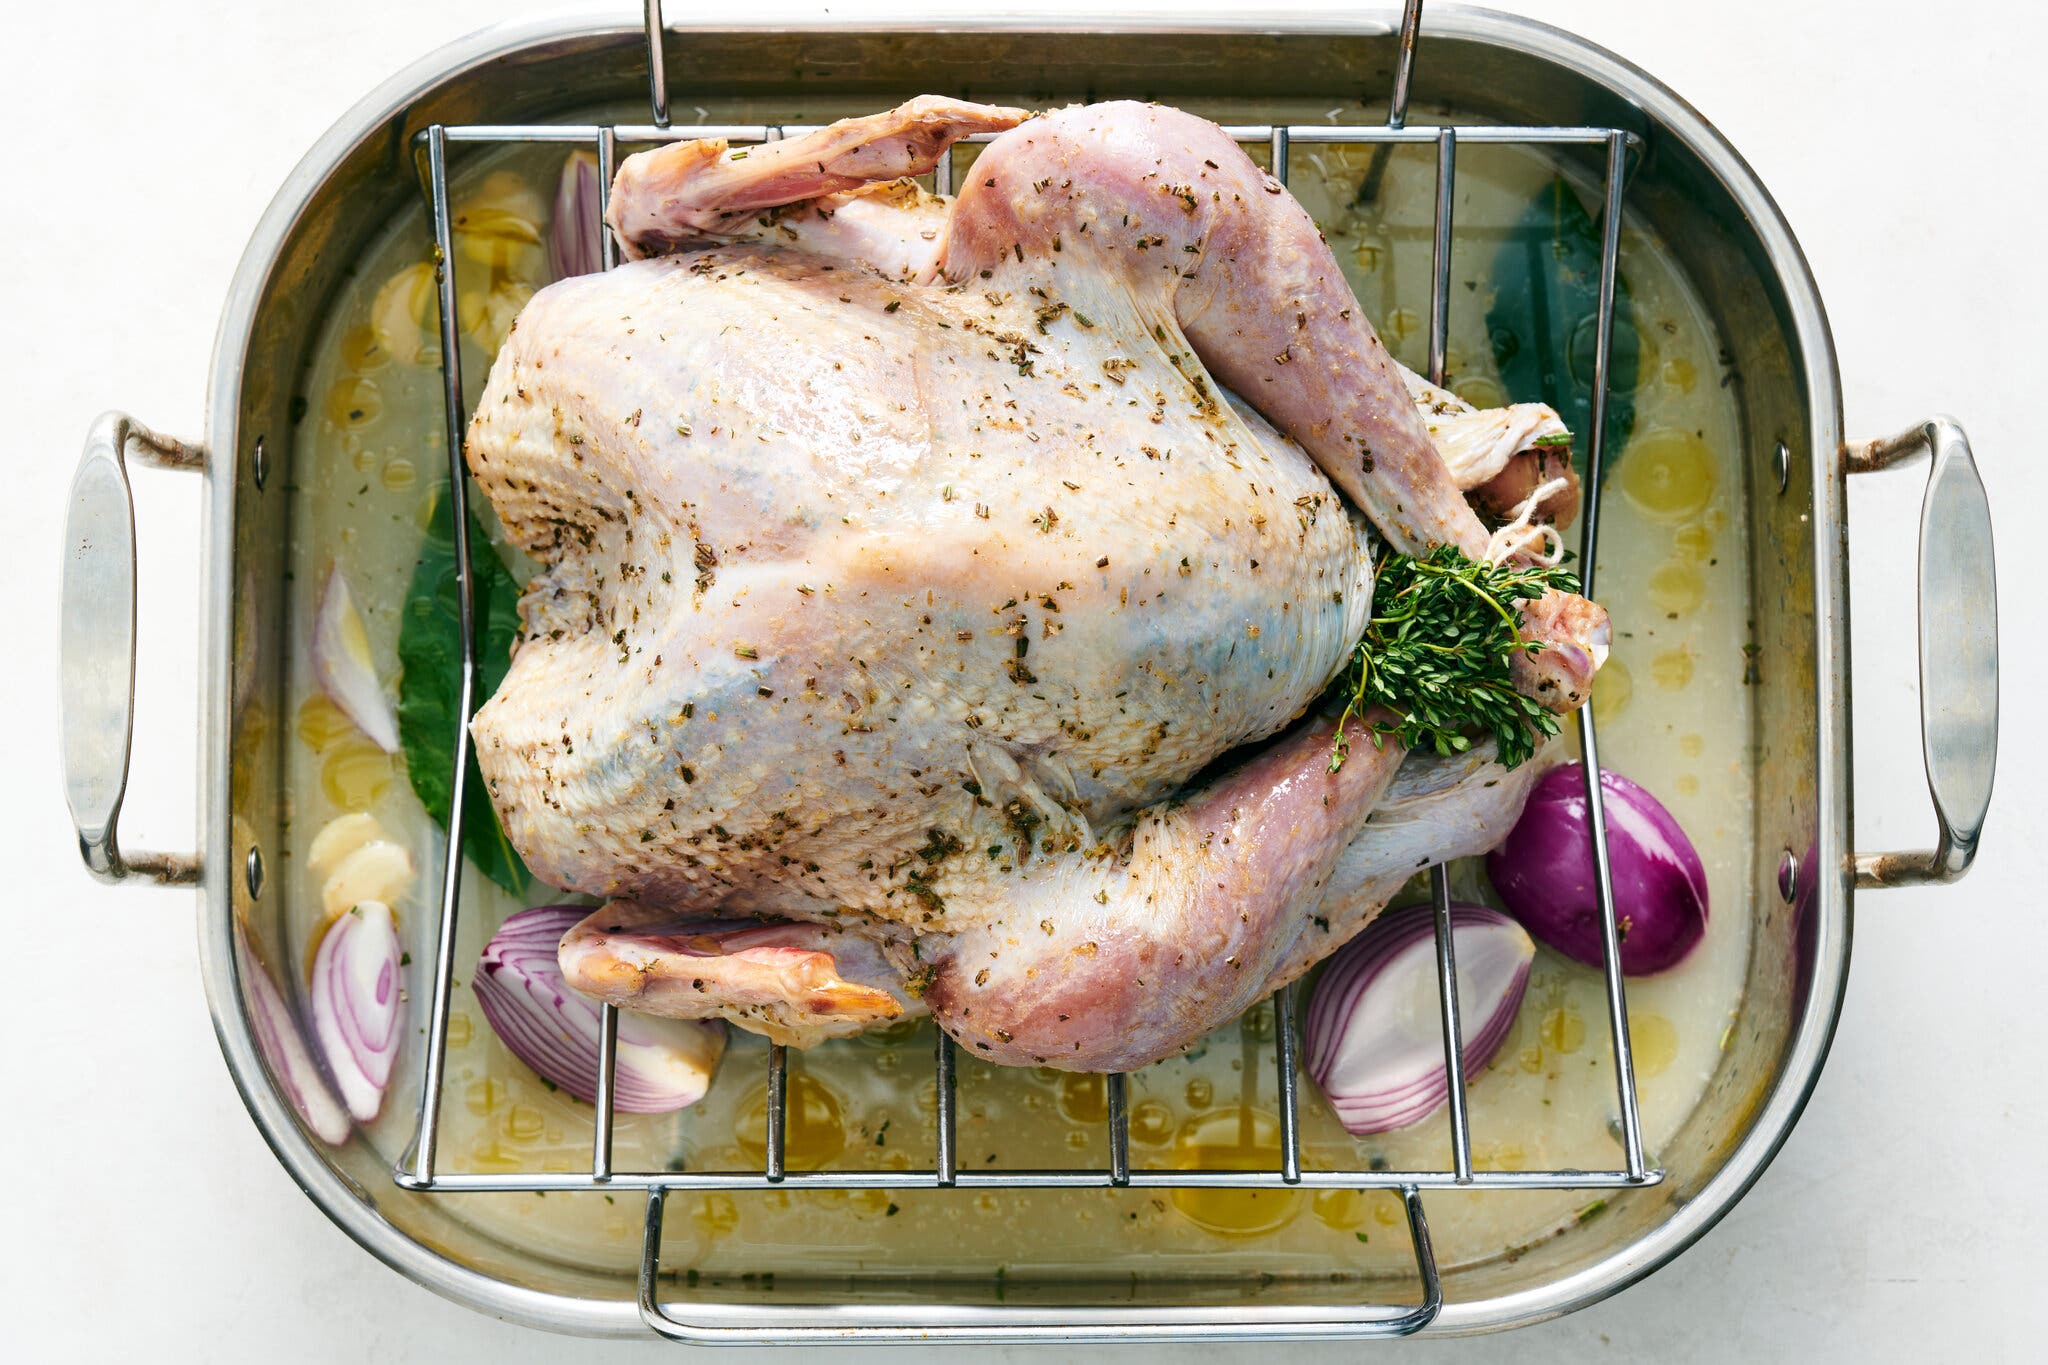
A rack inside the roasting pan helps air circulate around the bird as it cooks.Credit…David Malosh for The New York Times. Food Stylist: Barrett Washburne.
To roast, put the turkey neck (if using) in the bottom of your roasting pan, then add wine, broth and aromatics. Place a rack inside the pan, and put the turkey on top. Stuff the turkey cavity with herbs, onions and garlic, if you like, then brush the bird with oil or melted butter.
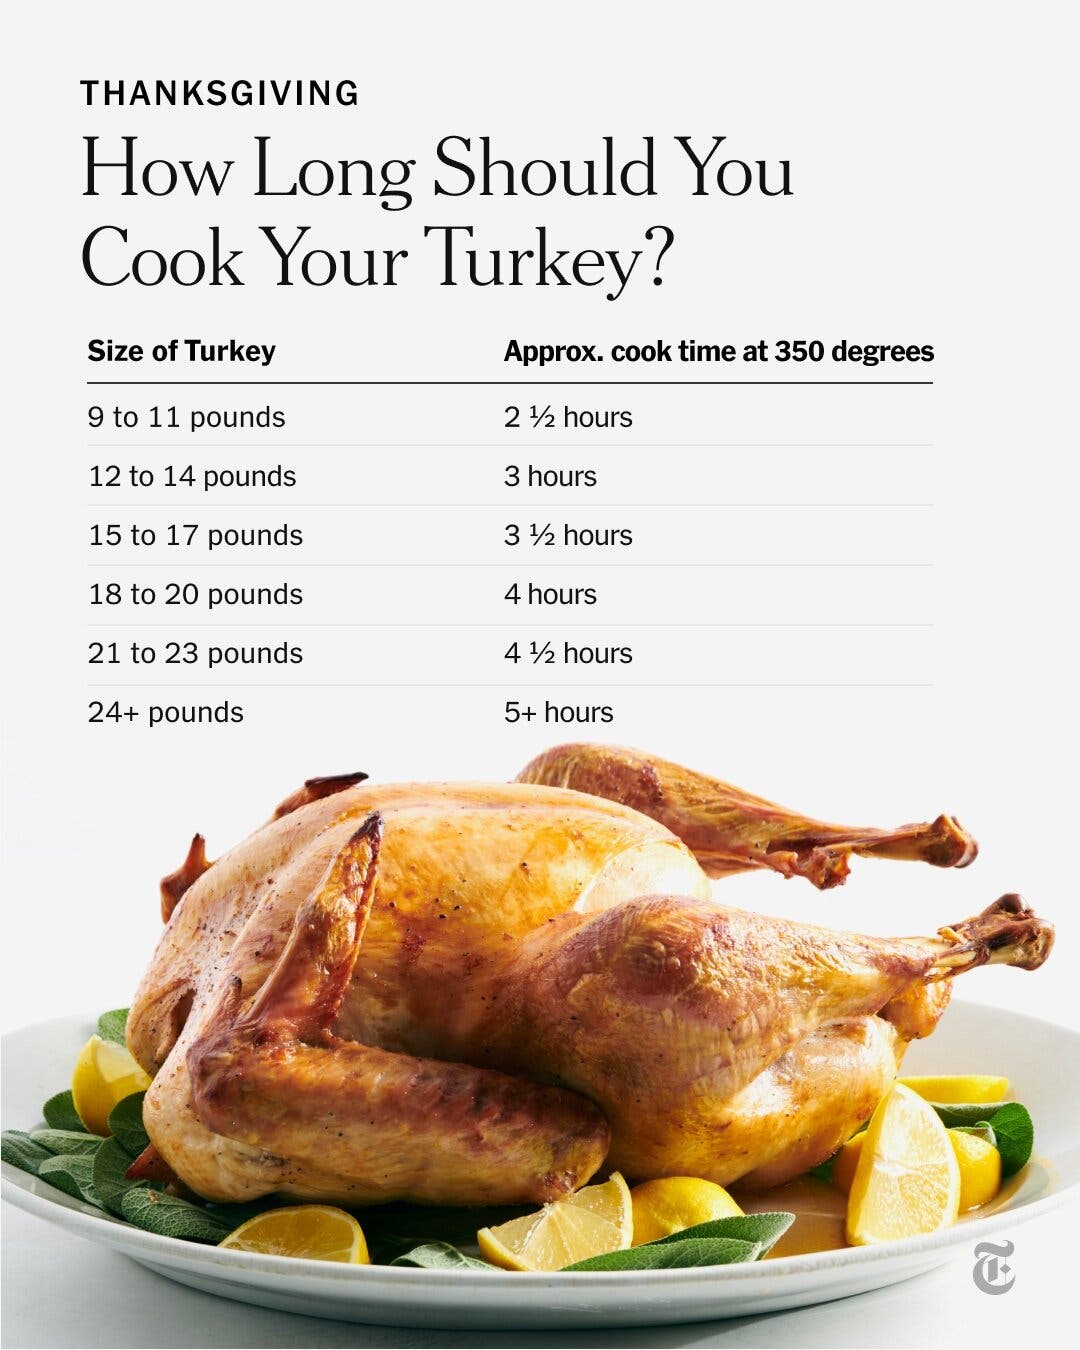
Start roasting at high heat to give the skin some color, then lower the heat and continue cooking for 1 ½ to 3 ½ hours depending on how big your bird is. You don’t need to baste, which slows down the roasting and can make the skin soggy.
Credit…David Malosh for The New York Times. Food Stylist: Simon Andrews.
Start taking the turkey’s temperature about 15 minutes before you think it might be done. To check the temperature, insert the probe into the thickest part of the thigh, taking care not to touch any bones. I like to check both thighs just to make sure. Don’t worry if the meat looks a little pinkish; some turkeys have pinker flesh than others and will keep that color even when cooked through. If you see red though, continue roasting it.
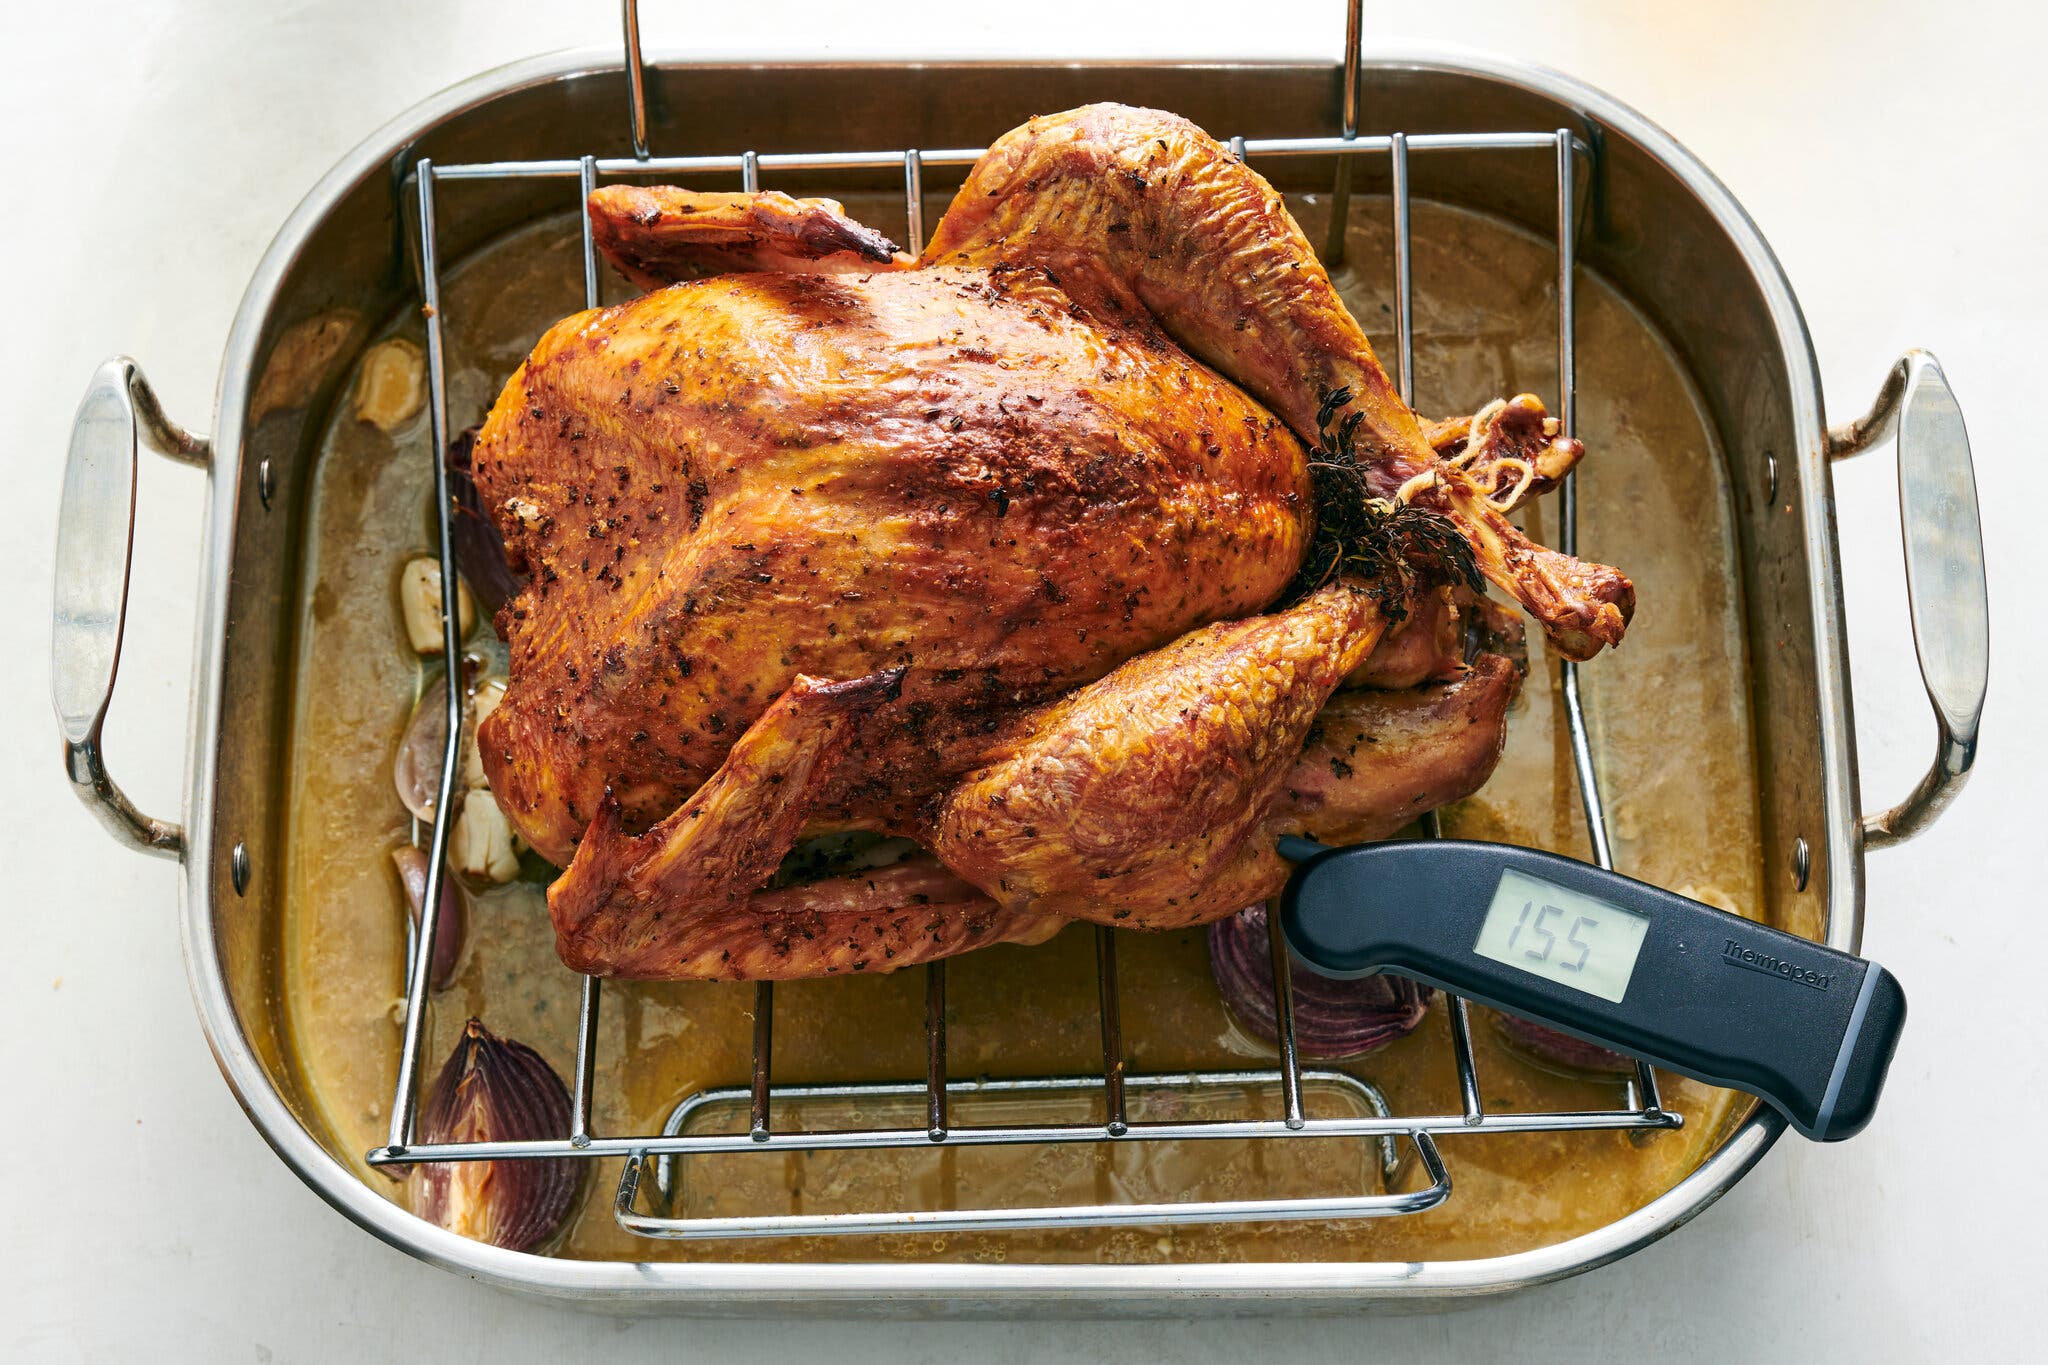
The turkey will continue cooking as it rests.Credit…David Malosh for The New York Times. Food Stylist: Barrett Washburne.
It’s done when it reaches 155 degrees on instant-read thermometer. (It’ll reach the U.S.D.A.-recommended 165 degrees while it rests.)
Step 6: Rest and Carve

Make sure to carve the turkey in the kitchen (and not at the table) to minimize mess.Credit…David Malosh for The New York Times. Food Stylist: Barrett Washburne.
Let the turkey rest, loosely covered with foil, for 20 to 30 minutes before carving. Save the pan drippings to add to gravy or to any stock you make from the carcass. Or if you’re not serving gravy, you can spoon the drippings directly over the meat for extra moisture and flavor.
Then, do all your carving in the kitchen, and not at the table, which can be very messy. You’ll need a sharp knife, a cutting board and some kitchen towels for any overflowing juices.
First, cut the legs and wings off the carcass. Then cut off the breast meat, following along the breast bone with your knife. Once you’ve cut the bird into parts, it will be easier to debone the thighs and slice up the breast. Leave the drumsticks and wings on the bone for serving.
But when it comes to turkey carving techniques, showing is easier than telling. See the video below for best practices.
Credit…The New York Times Cooking
Follow New York Times Cooking on Instagram, Facebook, YouTube, TikTok and Pinterest. Get regular updates from New York Times Cooking, with recipe suggestions, cooking tips and shopping advice.
Read the full article here


